Alien Skin Exposure 4
Push-button, analog-funk in a digital age
by Martin Taylor
 |
| Fern Processed in Exposure 4 |
Fast forward a decade or more and the popularity of Instagram and the Impossible Project and their like demonstrate a thirst for an analog feel in a digital age. Admittedly, a lot of ‘digital sucks’ hipsters never knew a time when there wasn’t a choice between analog and digital and, like most new converts, they have been born-again as puritanical zealots. But I digress; for the rest of us who want the flavor of analog processes without the toxic chemicals there are many options at many price points. From the cheap (though not cheap for Facebook) Instagram at one end to plugins like Aliens Skin’s Exposure 4 at the other. But we’ll get back to price in minute; for now let's look at what Exposure 4 can do for you.
 |
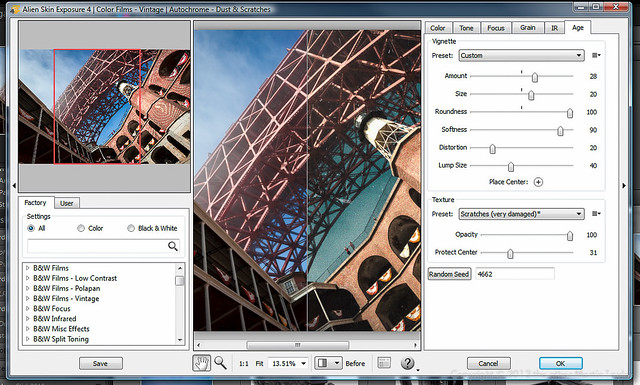
| Alien Skin's Exposure 4 UI |
Instagram on steroids?
It sort of is but in another way this comparison belittles Exposure 4. It’s nearly as easy to use as Instagram. For the purposes of this review I was using it mainly within Lightroom but I also tried it from Elements and Photoshop too and it felt properly integrated into them all. From Lightroom ‘Edit in Exposure 4’ launches the Exposure plugin and it fires up pretty quickly. Even without reading and documentation you will be up and running in no time. A preview image takes up the center of the window showing the effect of your filter in real time. You choose your preset or saved custom preset from the list in the bottom left quarter. The top left quarter preview image shows the effect of a preset just as you roll over it, even without clicking. It also shows the whole image with a indicator frame showing what area of the image you’re looking at in the main preview window. This is useful when you have zoomed into your main image (using the scroll wheel achieves this) and got lost within your image.Color Presets in Exposure 4
B&W Presets in Exposure 4
There are hundreds of presets to choose from creating effects that date back from the dawn of photography through to the latest film stocks and trendy cross-processing. You can filter the effects by monochromatic and color of you can search if you remember any part of the name of the effect you are looking for.
 |
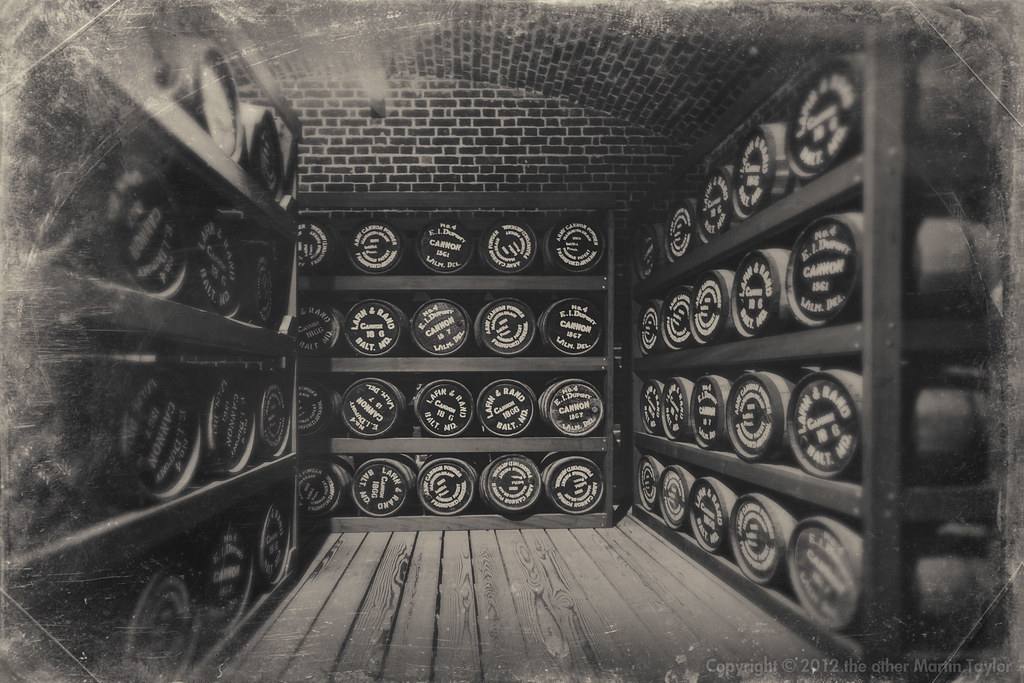
| Civil War Fort Point Powder Room processed in Exposure 4 |
Although the presets may be a bit unsubtle out of the box that’s not to say that the effects you can achieve are not professional. When you tweak a preset and you like the results you can save your own presets for future use. The film grain effects, borders and various alternative technique overlays are amazingly convincing. The effects you can achieve are pretty inspiring and you can find yourself wasting hours on one image messing around with presets and tweaking them as you see fit. On the other hand, if you have a clear idea of what you want to achieve you can very quickly find a suitable preset to achieve it, tweak it to perfection and be done with the image in soft order. A nice feature is that, in Lightroom, you can work on several images at once. This means that, if you find the look you want and apply it to one image you can apply a consistent look to other images you think will benefit from the same look.
Conclusion
 |
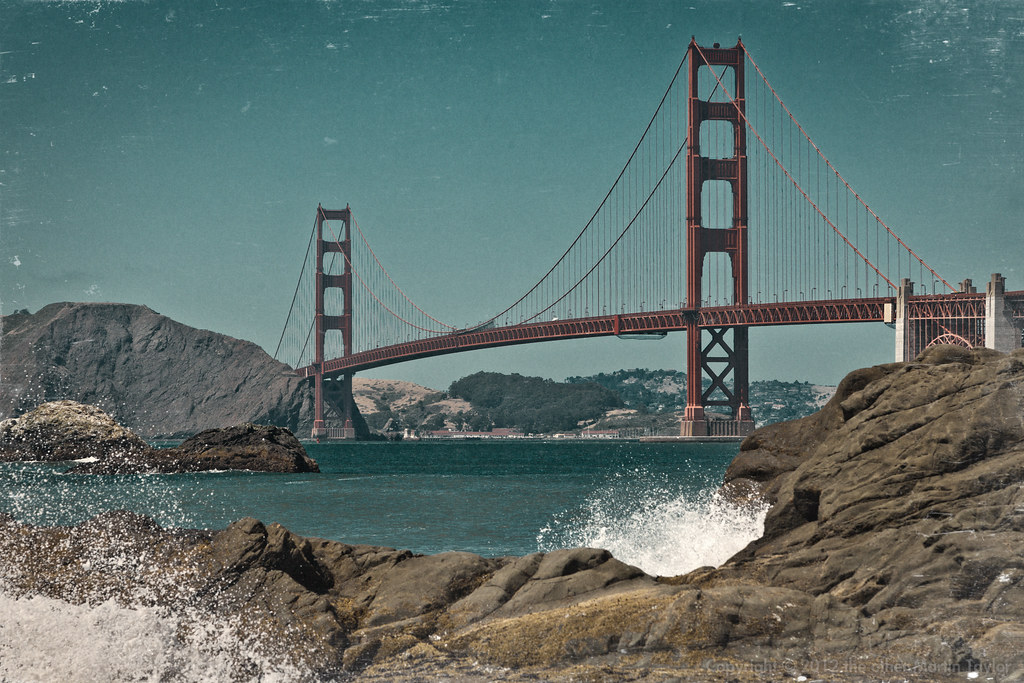
| Golden Gate Bridge processed in Exposure 4 |
Truth be told, this product is probably not aimed at me. I am not rich enough or trendy enough to be their target audience. I do see Exposure 4 being incredibly useful for photographers who need a grungy, retro-look with a fast turn around. Senior and wedding photographers may find it pays for itself very quickly if you have a certain kind of client. For those kind of photographers the relatively high price might be an advantage because it will keep the riff-raff out. Uncle Jim is unlikely to buy Exposure 4 if he’s currently using Elements to process his images. This means that even the out-of-the-box preset looks will not be seen that commonly on Flickr. This exclusivity maybe what you need if you’re selling an expensive post-processed look as part of your package. Certainly this grungy look is very fashionable at the moment. Exposure 4 is one of the simplest, most customizable ways to achieve many of these looks resulting in very professional looking images. If you need this high-concept look, Alien Skin’s Exposure 4 may be just what you’re looking for.
